

Store Owners: When a Custom Shopify Theme Is Worth $4,500 SGD
Choose a custom Shopify theme when off-the-shelf templates cannot deliver the brand, user experience or business logic your store needs, whether that’s complex product data, a checkout-adjacent flow that’s unique to you, or a conversion setup you can’t achieve by tweaking settings. For most stores, this matters because performance, accessibility and merchant experience have a direct line to revenue. If you’re unsure, start with a short discovery audit or request a scoped quote before committing to a full build.
TL;DR:
- Custom themes are justified mainly for stores with complex product data, unique user interactions, or distinct brand experiences that off-the-shelf templates cannot support effectively.
- Maintaining a custom theme requires thorough documentation, version control, and ongoing updates to avoid technical debt that could hinder future modifications.
- Performance improvements targeted at Core Web Vitals, like fast image loading and minimized JavaScript, can significantly boost revenue and conversion rates.
- A well-structured block and section layout, along with metafields, simplifies daily content management and supports scalable, rich product information without code edits.
- When commissioning a custom theme, demand detailed proposals, explicit testing commitments, a clear maintenance plan, and comprehensive QA to prevent costly issues post-launch.
Table of Contents
- When to choose a custom Shopify theme versus customising an existing one
- The technical foundation: sections, blocks and metafields explained
- Performance and accessibility targets a custom theme must hit
- DIY, freelancer or agency: how to evaluate each route
- Cost and timeline: what a custom build actually takes
- The commissioning checklist: what to demand before you approve launch
- Deploying and maintaining your theme after launch
- Why store owners choose Soodo for custom Shopify builds
- What actually matters when you commission a custom theme
- Ready to commission a custom Shopify theme
- Sources
- FAQ
When to choose a custom Shopify theme versus customising an existing one
Not every store needs bespoke development. The decision usually comes down to how far your requirements sit from what a well-built Online Store 2.0 theme, plus a handful of apps, can already do.
A custom theme earns its cost when your business has genuine structural needs that off-the-shelf templates weren’t designed for. Large multi-language catalogues with complex variant logic, product data that doesn’t fit neatly into standard Shopify fields, or a brand experience that depends on interactions no theme in the Shopify Theme Store offers are all good reasons to build from scratch. So is a checkout-adjacent flow, such as a bespoke quote request or a subscription builder, that needs to feel native to your site rather than bolted on through an app.
On the other hand, an existing theme is often the smarter call when speed to market and budget discipline matter more than originality. If your product catalogue is straightforward, your flows are standard (browse, add to cart, checkout) and you’re validating a new business idea, a proven Online Store 2.0 theme paired with the right apps will get you live faster and cheaper than a custom build.
Before committing either way, weigh these factors:
- Catalogue complexity: does your product data (variants, bundles, configurators) fit standard Shopify fields, or does it need custom metafields and templates?
- Brand differentiation: is your UX a genuine point of competitive advantage, or would a well-customised template do the job?
- Maintenance capacity: can you resource ongoing updates to custom code, or would you rather rely on a vetted theme’s update cycle?
- Timeline pressure: do you need to launch in weeks, or can you invest several months in a bespoke build?
Technical debt is the trade-off most founders underestimate. A custom theme built without version control, clear documentation or a maintenance plan can become harder to update than the generic theme it replaced. If you’re choosing bespoke development, budget for ongoing care from day one, not just the initial build. Stores selling into a tightly defined niche often find that a focused product and audience strategy shapes exactly which theme features are worth the custom investment and which aren’t.
The technical foundation: sections, blocks and metafields explained
Understanding Shopify’s modern theme architecture matters even if you never touch code yourself, because it determines what you’re paying for and how much editing freedom you’ll have after launch.
Online Store 2.0 replaced older, more rigid Liquid templates with JSON templates and section groups, which means almost any part of a page, not just the homepage, can be built from reusable sections. According to Shopify’s developer guidance, this shift gives merchants far more flexibility to rearrange, add or remove content without a developer needing to touch the underlying code every time.
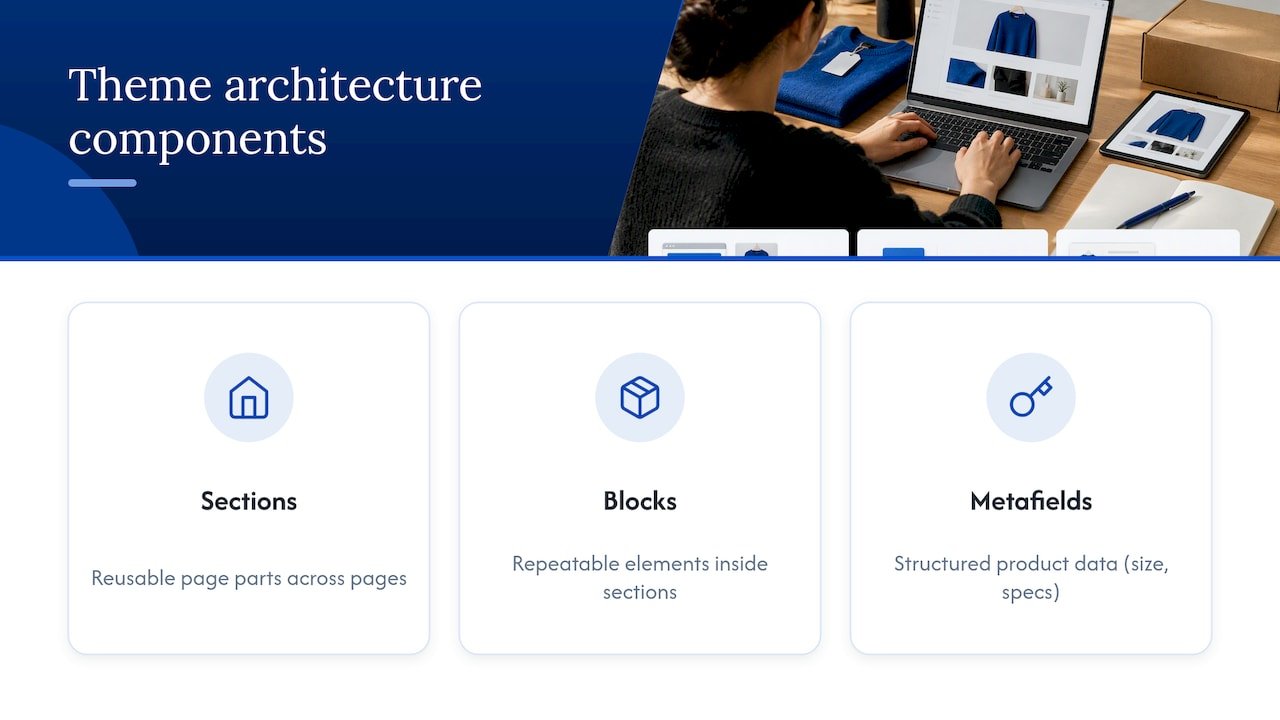
Sections and blocks are the building blocks of that flexibility. A section might control a full-width banner or a product recommendation carousel, while blocks are the smaller, repeatable elements inside a section, such as a testimonial card or an image with text. The way a developer structures this determines whether you can genuinely self-serve changes or whether every small edit requires a support ticket back to your agency.
This is where a lot of custom themes go wrong. Shopify’s own guidance is explicit that developers should group settings into logical blocks and avoid overly granular block structures, because overly fragmented settings confuse merchants and increase support requests rather than reducing them. A theme with fifteen separate toggles for a single banner is technically flexible but practically unusable for a non-technical team member trying to update a promotion at short notice.
Metafields are the other half of the picture, and arguably the part most store owners underestimate when commissioning a theme. Metafields let you attach structured data, materials, care instructions, size guides, nutritional information, warranty terms, to products, collections or pages, and then surface that data through dynamic sources in the theme editor without custom code for every new field. For a fashion brand, that might mean a consistent size guide section across every product page. For a supplement brand, it might be dosage and ingredient data pulled automatically into a standard layout. Done well, metafields let your team add new products with rich, consistent content without ever opening a code editor. Metafields also underpin structured content like user-generated reviews and imagery, which is worth planning for early if you intend to lean on customer content within product pages.
The design choices that separate a good custom theme from a frustrating one are usually about usability for the person managing the store day to day, not about visual polish. A theme that groups related settings sensibly, documents what each metafield is for, and avoids unnecessary complexity in the editor will save you hours every month compared with one that looks impressive in a demo but is painful to actually run.
Performance and accessibility targets a custom theme must hit
A custom theme is only as good as how it performs in a browser, and Shopify’s own review process treats performance and accessibility as non-negotiable, not optional extras.
Three Core Web Vitals matter most: Largest Contentful Paint (LCP), which measures how quickly your main content appears; Cumulative Layout Shift (CLS), which measures visual stability as the page loads; and Interaction to Next Paint (INP), which measures how responsive the page feels once a shopper starts clicking and scrolling. These aren’t abstract engineering metrics. Real ecommerce results tie them directly to revenue.
One case study found that optimising Core Web Vitals for an ecommerce landing page produced significant uplifts in both revenue per visitor and conversion rate, according to Web. That’s the kind of business case worth putting in front of anyone questioning why performance budget belongs in a theme brief rather than being treated as an afterthought.
Specific tactics a well-built custom theme should include:
- Prioritise the LCP image: the hero or main product image should load with priority rather than competing with other assets.
- Minimise heavy client-side JavaScript: every script that runs before the page is interactive delays INP and risks janky scrolling.
- Reserve space for dynamic content: banners, ads and lazy-loaded images should have defined dimensions so they don’t shift layout once they load, a core technique for reducing CLS according to web.dev’s CLS guidance.
- Choose fonts carefully: system fonts or well-optimised web fonts with proper fallbacks avoid layout shift and slow text rendering.
- Keep the page eligible for the browser’s back/forward cache: avoiding certain JavaScript patterns means returning shoppers get an instant reload rather than a full page fetch.
Accessibility sits alongside performance in Shopify’s own theme review process. The Shopify Theme Store’s accessibility requirements call for a minimum average Lighthouse accessibility score and manual checks focused on the critical path from the homepage through to checkout, not just a single page in isolation. That means keyboard navigation, colour contrast, alt text and proper heading structure all need attention across the journey a shopper actually takes, not just the homepage a developer demos in a pitch.
The right testing approach combines lab data with field data. Lighthouse audits in a browser give you a controlled, repeatable lab score, but real shopper behaviour varies by device and connection, so pairing Lighthouse with field measurement through the web-vitals library gives you a fuller picture of what actual visitors experience. Layer in A/B testing once the theme is live, so performance and UX changes can be validated against real conversion data rather than assumptions. Several of the technical and UX fixes we cover for lifting conversion start exactly here, at the intersection of page speed and checkout friction.
DIY, freelancer or agency: how to evaluate each route
Once you’ve decided a custom theme is the right call, the next decision is who builds it. Each route has a different cost, timeline and risk profile, and the right answer depends on your technical resources and how central the theme is to your competitive position.
- DIY development suits founders with existing coding skills and a narrow, well-defined customisation. It’s the cheapest and fastest route when the scope is small, but most non-developers underestimate how much Liquid, JSON template structure and theme architecture knowledge is needed to do this well without breaking things during updates.
- Freelancer engagements often cost less than agency work and can suit a single, clearly scoped project. The trade-off is coordination: you become the project manager, responsible for QA, code ownership and what happens if that freelancer becomes unavailable mid-project or after launch.
- Agency delivery costs more upfront but typically includes end-to-end project management, dedicated QA, performance and accessibility optimisation, staff training and post-launch support baked into the engagement, which matters most when the theme is central to how you compete.
Whichever route you choose, the proposal itself should tell you most of what you need to know before you sign anything. A vague quote with no detail on testing or ownership is a warning sign regardless of price.
Require the following in any proposal before committing:
- Clear scope: exactly which templates, sections and features are included, and which are explicitly out of scope.
- Deliverables list: design files, staging access, documentation and training materials you’ll receive at handover.
- Testing commitments: what devices, browsers and edge cases will be checked before launch.
- Source control practices: whether the code lives in a Git repository you retain access to, not just the developer’s local machine.
- Handover and maintenance terms: what happens after launch, who owns the code, and what ongoing support costs.
Custom eCommerce builders illustrate this range well. Agencies such as Edgematics Group show the kind of end-to-end delivery a dedicated eCommerce build can involve, from architecture through to launch support, which is a useful reference point when comparing proposals against what you’re being quoted.
Cost and timeline: what a custom build actually takes
Pricing for a custom Shopify theme generally follows one of three models: fixed-price for a clearly scoped project, hourly for work that’s likely to evolve, or a retainer for ongoing development and iteration. Fixed-price suits most first-time commissions because it gives you budget certainty, provided the scope is genuinely locked down before work starts.
The biggest cost drivers are the number of unique templates you need, how many third-party integrations the theme must support, and how much custom functionality sits outside standard Shopify features. A single-template store with a couple of app integrations will cost meaningfully less than a multi-template build with custom checkout logic, bespoke filtering or a product configurator.
Rather than quoting a single figure that varies wildly by scope, it’s more useful to think in terms of build complexity:
- Small builds: a handful of templates, standard flows, light customisation on top of an Online Store 2.0 base.
- Mid-market builds: multiple custom templates, several app integrations, bespoke sections built specifically for the brand.
- Enterprise builds: complex data models, multiple markets or languages, deep API integrations and dedicated performance engineering.
A typical milestone schedule runs through discovery (requirements, content audit, technical planning), design (wireframes through to high-fidelity mockups), development (template and section build, app integration), QA (cross-browser, cross-device, accessibility and performance testing) and launch (staged rollout, monitoring, post-launch fixes). Each phase should have a defined output you sign off before the next begins, so scope creep gets caught early rather than at the invoice stage.
Budget for costs beyond the build itself. App subscriptions for features like reviews, subscriptions or advanced search add up monthly. Ongoing maintenance, whether in-house or contracted, is needed to keep the theme compatible with Shopify platform updates. If you’re expanding into new markets, internationalisation (currency, language, tax logic) is rarely included in a base quote and should be scoped separately.
The commissioning checklist: what to demand before you approve launch
A strong brief and a strict QA process are what separate a theme that performs from one that looks fine in a demo and breaks on real devices. Use this as a starting point for your own RFP or acceptance criteria.
- Discovery outputs: require documented personas, key user journeys, a full content inventory and a metafields plan before design work begins, not after.
- Core Web Vitals targets: set explicit LCP, CLS and INP thresholds in the brief, not just “make it fast”, so there’s something concrete to test against at handover.
- Responsive testing: demand evidence of testing across real device sizes, not just a resized browser window.
- Edge-case testing: Shopify’s own theme review guidance flags long words breaking layouts, duplicated sections causing conflicts, and variant changes not updating correctly as common failure points worth testing explicitly before launch.
- Form and error handling: check that validation messages, empty states and failed submissions are all handled gracefully, not just the happy path.
Pro Tip: Ask your developer to demonstrate the theme with a genuinely long product title and a fully sold-out variant before you approve anything. These are the two edge cases that break the most themes in production.
Deployment deserves its own checklist. Before going live, confirm the theme has been fully tested on a staging or development store, that a rollback plan exists if launch reveals a critical issue, and that real user monitoring (RUM) and analytics are correctly instrumented from the first minute the new theme goes live, not added as an afterthought once traffic starts arriving. Our own Shopify store creation checklist covers this ground in more depth if you want a reference to hand to whoever is building for you.
Deploying and maintaining your theme after launch
Publishing a custom theme through Shopify admin is straightforward in principle: upload the theme file as a zip through Online Store, Themes, then preview it thoroughly before publishing live. The pitfalls tend to show up around that simplicity, not the upload itself. Publishing straight to your live store without a staging review, skipping a check of how existing apps interact with the new theme, or forgetting to test checkout with a real test order are the mistakes that cause the most damage after launch.
Version control discipline pays for itself quickly once a theme is live and evolving. Keeping the theme code in a Git repository, using a dedicated development store for testing changes before they touch production, and tagging releases so you can roll back to a known-good version if something breaks are all standard practice for any team managing an active codebase, and Shopify theme development is no exception.
Sensible ongoing practices include:
- Monitor Core Web Vitals continuously through real user monitoring, not just a one-off Lighthouse audit at launch.
- Track JavaScript errors in production so issues surface before customers report them.
- Run structured A/B tests on changes rather than shipping based on opinion alone.
- Review theme performance quarterly, not just when something visibly breaks.
Knowing when to refactor rather than patch is a judgement call worth budgeting for in advance. A theme accumulating small workarounds for every new feature request is usually cheaper to partially rebuild than to keep extending, and setting aside a maintenance budget from day one avoids that decision being forced on you during a crisis.
Why store owners choose Soodo for custom Shopify builds
A founder-led Shopify agency that has consulted on many stores, which means every engagement is shaped by direct operator experience rather than a templated process handed to junior staff. That matters most in exactly the areas this guide has covered: performance, accessibility and a theme structure your team can actually manage without calling a developer for every small edit.
Our process starts with a discovery audit to establish whether a custom build, a migration or an optimisation of your existing store is the right move, followed by a scoped proposal so you know exactly what you’re paying for before work begins. Development happens on a staging environment, with QA against the same performance and accessibility benchmarks covered above, and handover includes training so your team can manage day-to-day content changes independently.
If you’ve read this far because your current theme is holding your store back, our strategic approach to Shopify website development and portfolio of past projects are worth a look before you brief anyone.
What actually matters when you commission a custom theme
The conventional advice on custom Shopify themes spends too much time on visual design and not nearly enough on merchant usability and technical debt. A theme can look stunning in a pitch deck and still be a liability six months later if every content update requires a developer, or if nobody budgeted for the ongoing maintenance that any custom code needs.
What the evidence in this guide actually supports is a narrower priority list: get the section and block structure right so your team can self-serve changes, treat Core Web Vitals and accessibility as launch blockers rather than nice-to-haves, and demand a maintenance plan in writing before you sign off on any proposal. Everything else, the exact shade of your brand colour, the precise animation on your product cards, matters far less to your bottom line than whether your checkout loads fast on a mid-range phone.
If you take one thing from this guide, let it be this: interrogate the proposal’s testing and handover terms as hard as you interrogate its design mockups. That’s where most custom theme projects quietly go wrong.
— Soodo
Ready to commission a custom Shopify theme
If this guide has confirmed that your store needs bespoke work rather than another template tweak, Soodo builds custom Shopify themes with the performance, accessibility and merchant usability standards covered above already built into the process, rather than treated as a final checklist item.
We offer new Shopify website development from $4,500 SGD one-off for a full custom build, and existing store optimisation from $1,600 SGD one-off if your current theme just needs performance and conversion work rather than a full rebuild. Both engagements start with the same founder-led discovery process, so you get a scoped proposal before any commitment. If you’re migrating from another platform first, our platform migration service from $4,000 SGD one-off covers that groundwork. Get in touch to scope your project and see what a custom theme would actually cost for your specific catalogue and flows.
Sources
FAQ
Can Shopify themes be customised?
Yes, every Shopify theme can be customised through the theme editor, and Online Store 2.0 themes go further by using sections and blocks that let you rearrange and edit most pages without touching code. For deeper changes, such as custom logic or unique layouts, a developer can modify the underlying Liquid, JSON templates and metafields directly.
How do I build my own Shopify theme?
Building a custom theme starts with planning your templates, sections and metafields around your actual content and product data, then developing in Liquid within a development store before moving to production. Most non-developers commission this work from a freelancer or agency, since it requires familiarity with Shopify’s theme architecture to build something maintainable.
How do I upload a custom theme to Shopify?
You upload a custom theme as a zip file through your Shopify admin, under Online Store and then Themes, using the “Add theme” option to upload from your computer. Always preview the uploaded theme thoroughly on a development or staging view before publishing it live, checking checkout and key journeys with test orders.
Is it worth paying for a Shopify theme?
It’s worth paying for a theme, custom or premium, when your business needs go beyond what free themes offer, whether that’s unique brand UX, complex product data or conversion-critical flows a generic template can’t support. For straightforward catalogues and standard shopping flows, a well-configured free or lower-cost Online Store 2.0 theme paired with the right apps is often the more practical choice.
What should I check before approving a new custom theme?
Before launch, confirm the theme meets clear Core Web Vitals targets, passes an accessibility check against Shopify’s Theme Store requirements, and has been tested against edge cases like long product titles, duplicated sections and variant changes. You should also confirm you have source control access and a documented maintenance plan before signing off.
Recommended

Jessica Bong
Jessica Bong is the founder of Soodo, a Singapore Shopify agency that builds, revamps and migrates Shopify stores, with every store set up to be found in AI search (GEO). She has spent over 10 years in ecommerce and runs her own Shopify brand, Patch&Bagel, where every Soodo technique is tested first. Jessica is also a WSQ-certified Shopify trainer at Equinet Academy.