
Shopify Checkout Customization Has 5 Routes That Survive Upgrades
If your goal is branding, logos, colours, fonts, banners, head to Settings > Checkout and use the checkout and accounts editor: no code required on Basic and up. If you need new UI or custom logic, that calls for Checkout UI extensions, Functions, or the Branding API, and several of those routes need Shopify Plus. Either way, open your Configurations tab and check the upgrade guide before you build anything.
TL;DR:
- The visual editor changes logos, colors, fonts, banners, and checkout and account surfaces on Basic and higher; market specific branding requires Advanced or Plus.
- In checkout UI blocks generally require Shopify Plus; Thank you and Order status extensions reach plans above Starter, but post purchase use may need approval.
- Shopify Functions handle conditional discounts, cart validation, shipping, and payment behavior, but payment features may be restricted by plan and market; test real carts.
- As Shopify upgrades legacy checkout.liquid and injected scripts, run its upgrade guide, replace tracking with supported pixels, verify checkout_completed events, and test Shop Pay.
Table of Contents
- Five practical ways to customise checkout and when to use each
- Using the checkout and accounts editor for no-code branding
- Checkout UI extensions: targets, placement and practical limits
- Shopify Functions: where logic belongs instead of scripts
- Checkout Branding API: profile-based styling for developers
- Plan and market limitations: the quick checklist to verify before building
- Implementation workflow: audit, build, test, deploy
- Testing, measurement and migration checklist to avoid lost data
- Concrete mini-examples: branding, an upsell block, a validation rule
- When checkout work needs a specialist, not a DIY afternoon
- How we help with checkout migrations and custom builds
- FAQ
- Sources
Five practical ways to customise checkout and when to use each
Before you touch anything, it helps to know which lever does what. Shopify gives you several routes, and picking the wrong one wastes time.
- Checkout and accounts editor: no-code branding, logos, colours, fonts, banners, available from Basic upwards.
- Checkout UI extensions: add blocks or custom content to specific steps using defined targets and Polaris components.
- Shopify Functions: backend logic for discounts, validation, shipping and payment behaviour.
- Checkout Branding API: developer-driven, profile-based styling for teams that need design-system consistency.
- Apps, web pixels and payment extensions: the upgrade-safe substitute for anything you used to do with injected scripts.
Favour the no-code editor whenever the change is purely visual. Reach for an extension or Function only when you need behaviour the editor can’t touch, like a conditional discount or a custom upsell block. Every one of these routes is built to survive Shopify’s own platform upgrades, which is precisely why legacy checkout.liquid edits and injected scripts are being phased out. If you’re still running either, plan a move to supported customisation methods.
Using the checkout and accounts editor for no-code branding
The checkout and accounts editor sits inside Shopify admin, under Settings > Checkout. Open the active configuration, or create a draft, and you’ll find controls for your logo, colour palette, typography, banner and background images, button styling, and form field appearance. These controls extend to the checkout itself, the Thank you page, the Order status page, and customer account surfaces, all from one place, and they’re available to every plan from Basic upward.
To get started:
- Open Settings > Checkout in your Shopify admin.
- Select your active configuration or create a new draft to experiment safely.
- Adjust branding elements (logo, colours, fonts, banners) in the editor’s visual panels.
- Use the built-in preview to check how changes render across checkout, Thank you and Order status pages.
- Publish the draft once you’re satisfied, or keep testing before committing.
The preview is a simulator, not a live transaction. Some actions, payment included, are deactivated so you can inspect layout without placing a real order. Market-specific adaptations, meanwhile, are reserved for Advanced and Plus plans, so if you’re serving several currencies or regions with different branding, check your plan tier first.
Pro Tip: Check text and button contrast against your new background before publishing: a palette that looks sharp in a mockup can make checkout fields hard to read, and Shopify’s own styling guidance emphasises legibility.
Checkout UI extensions: targets, placement and practical limits
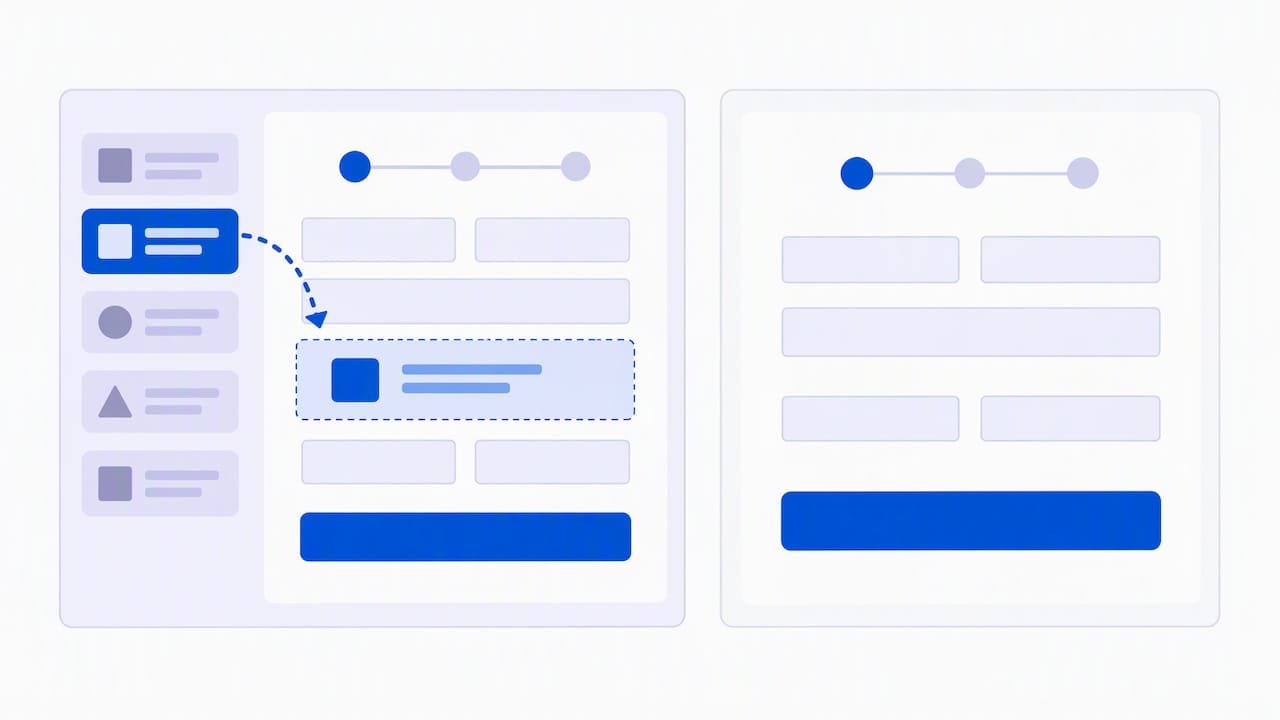
Checkout UI extensions let you add functional blocks inside the checkout flow itself, but they work within a fixed architecture of targets. A target is a defined slot, information step, shipping step, payment step, where Shopify allows an extension to render. Targets define where an extension can render, and merchants place eligible app blocks through the checkout editor after a developer has built and deployed the extension.
- Extensions are built from Polaris web components and target-specific APIs, not free-form HTML or CSS.
- Extension settings and capabilities depend on the extension and its available targets.
- Extensions use Shopify’s defined targets and components, which constrain how they render in checkout.
- In-checkout UI targets, blocks inside the information, shipping or payment steps, are generally restricted to Shopify Plus.
- Thank you and Order status page targets are open to plans other than Starter, and post-purchase extensions are available more broadly, though live use can require access approval.
That plan split matters for planning: a merchant on a standard plan can still build a strong post-purchase or Thank you page extension, but a true in-checkout upsell block needs Plus. Operational caps apply too: up to 30 active blocks per block type and up to 10 block placeholders per checkout page.
Shopify Functions: where logic belongs instead of scripts
Shopify Functions handle backend checkout logic that the editor and UI extensions can’t: custom discounts, cart validation, shipping behaviour and payment-method visibility. They replace Shopify Scripts, which are being deprecated, so any store still running checkout.liquid-era Scripts needs a migration plan this year.
- Discounts: build conditional logic beyond standard discount codes, like percentage-off tiers based on cart contents.
- Validation: block checkout when an order breaches a rule, such as a quantity limit or an incompatible product combination.
- Payment behaviour: hide, reorder or rename payment methods at checkout based on cart or customer attributes.
Functions are generally available beyond Plus through apps, but some payment APIs and operations carry plan and geographical restrictions, payment terms themselves require Plus, and certain restricted operations simply have no effect on non-Plus stores. Verify both the merchant’s plan and target market before writing payment-related logic.
Pro Tip: If you’re migrating Scripts to Functions, test discount rules against a real cart in a development store before launch.
Checkout Branding API: profile-based styling for developers
For teams that need design-system consistency across checkout surfaces, the Checkout Branding API provides a developer-driven alternative to the visual editor. The checkoutBrandingUpsert mutation accepts design-system values, colours, typography, corner radius, header and button styles, and applies them against a specific checkout profile.
- Query
checkoutProfilesto identify the profile you want to style, published or draft. - Send design-system customisations through
checkoutBrandingUpsertagainst a draft profile first. - Preview and validate the result before publishing to the live profile.
Styling here applies broadly across checkout surfaces rather than page by page, and image or SVG support has its own constraints, so this route suits teams codifying a brand system, not one-off tweaks.
Plan and market limitations: the quick checklist to verify before building
Before committing engineering time, confirm the following against your actual plan:
- In-checkout UI targets are restricted to Shopify Plus, Checkout Branding API access is available to Plus or development stores, and market-specific adaptations are available on Advanced or Plus.
- Thank you and Order status page extensions are open to non-Starter plans, but live post-purchase use often needs access approval.
- Legacy checkout.liquid and additional scripts are being automatically upgraded, and stores relying on them risk losing analytics scripts and page customisations during that process.
If you’re unsure which tier you’re on or whether an upgrade makes sense, review a plan comparison before you brief a developer.
Implementation workflow: audit, build, test, deploy
A safe rollout follows a staged process regardless of which route you’ve chosen.
- Audit: run your personalised upgrade guide inside Shopify admin and list every script, app or Liquid customisation still in use.
- Choose and scaffold: pick the right route (editor, extension, Function, Branding API) and scaffold with Shopify CLI using
shopify app init, thenshopify app generate extension. - Develop and test: run
shopify app dev, preview against a draft checkout profile in a development store, and iterate until behaviour matches intent. - Deploy and place: deploy the extension, add the resulting block through the checkout editor, publish to a staged profile first, and watch analytics closely after launch.
This mirrors the documented developer workflow Shopify itself recommends, which keeps your build upgrade-safe rather than reliant on fragile, hand-edited checkout code.
Pro Tip: Keep a draft profile live permanently as your testing ground: it lets you preview new branding or extension placements without ever touching the configuration your customers see.
Testing, measurement and migration checklist to avoid lost data
Checkout changes carry real risk to analytics and conversion tracking, so verify these before and after any publish:
- Run the Shopify upgrade guide to flag apps or scripts that won’t survive the transition.
- Replace any remaining injected scripts with web pixel extensions or app pixels, the supported tracking route.
- Confirm
checkout_completedevents still fire correctly and that no unintended personal data is newly exposed. - Test accelerated checkouts, including Shop Pay, in an appropriate test environment, and re-verify discount logic after any Scripts-to-Functions migration.
Automatic upgrades for legacy Thank you and Order status pages began rolling out from January 2026, which makes this checklist a before-and-after step rather than a one-time task.
Concrete mini-examples: branding, an upsell block, a validation rule
- Branding: switch your primary colour and button corner radius inside a draft branding profile, preview against a real product, then publish.
- Upsell: place an order-summary add-on as a post-purchase extension or, on Plus, a Checkout UI extension block in the information step.
- Validation: write a Function that blocks checkout once a single line item’s quantity exceeds a set threshold, useful for limited-stock drops.
Each example maps to a different tool, which is exactly the point: match the business outcome to the right route before you write a line of code.
When checkout work needs a specialist, not a DIY afternoon
We built our approach around a founder-led, conversion-first process: every checkout rollout we run treats upgrade safety as non-negotiable, which means extensions and Functions over fragile script edits. A typical engagement starts with an audit of existing scripts and apps, moves through extension or Function development, and finishes with analytics migration and a staged rollout. If your checkout touches multiple markets, relies on custom Functions, or still runs on checkout.liquid, that’s usually the point where specialist help pays for itself.
— Soodo
How we help with checkout migrations and custom builds
We handle checkout upgrade planning, custom extension and Function development, and staged rollouts with analytics validation built in from day one. Whether you need an existing store optimised or a migration planned properly, our team manages it end to end. For a store that still runs on fragile legacy code, our checkout extensibility migration guide is a useful starting point, and merchants managing POS or back-office workflows alongside checkout changes may find FlowLab’s guide to POS customisation a helpful companion resource.
Get in touch through our new Shopify website development page to scope your upgrade or custom build.
FAQ
Can I customise my Shopify checkout page?
Yes. Basic plans and above can change logo, colours, fonts and banners through the checkout and accounts editor. Deeper functional changes, like in-checkout UI blocks, typically require Shopify Plus.
Does Shopify allow customisation of checkout functionality?
Yes, through Checkout UI extensions and Shopify Functions rather than direct code edits. Extensions add blocks at defined targets, while Functions handle backend logic such as discounts and payment visibility.
How do I design a checkout page?
Start in Settings > Checkout with the no-code editor for branding, then layer in Checkout UI extensions or the Branding API if you need custom blocks or design-system styling. Always preview changes against a draft configuration before publishing.
How do I edit the checkout page for a specific feature?
Identify which route controls that feature first: visual branding uses the checkout editor, new content blocks use UI extensions, and logic changes use Functions. Each has different plan requirements, so check your plan before building.
What happens to my old checkout customisations during the upgrade?
Legacy checkout.liquid and additional scripts are being automatically upgraded, and customisations built that way can lose associated analytics scripts and page content in the process. Reviewing your personalised upgrade guide before the migration happens is the safest approach.
Sources
- Shopify Help Center | Using the checkout and accounts editor
- Technologies for customizing Shopify checkout
Recommended

Jessica Bong
Jessica Bong is the founder of Soodo, a Singapore Shopify agency that builds, revamps and migrates Shopify stores, with every store set up to be found in AI search (GEO). She has spent over 10 years in ecommerce and runs her own Shopify brand, Patch&Bagel, where every Soodo technique is tested first. Jessica is also a WSQ-certified Shopify trainer at Equinet Academy.